SvelteKit Authentication using SvelteKitAuth and OAuth providers: A Comprehensive Guide
Senior Frontend Dev. Mostly Angular and Svelte. I will be sharing my day-to-day learning experiences here with the community.
NOTE: The contents of this article are now outdated. Please refer the updated content here: Authentication in SvelteKit using SvelteKitAuth
There are multiple ways in which we can authenticate a user over the web, few of them are: matching user credentials in the database, delegating responsibility to an external OAuth provider etc. We can extend those similar concepts in SvelteKit too and implement authentication.
SvelteKit does not provide out-of-box authentication. We can extend the means that we discussed above and implement authentication in SvelteKit. This guide will focus on implementing authentication in SvelteKit using SvelteKitAuth and OAuth providers. After reading this guide, you'll have a decent understanding of implementing authentication mechanisms in SvelteKit.
What is SvelteKitAuth?
SvelteKitAuth is part of the Auth.js project - Authentication for Web which is an open-source library that is easy to use.
SvelteKitAuth is an extension of NextAuth - a popular authentication framework from the Next / React world. NextAuth is now getting a major overhaul and is now becoming Auth.js
It can be used with any OAuth2 or OpenID Connect provider and has built-in support for 68+ popular services like Google, Facebook, Auth0, Apple etc.
Apart from OAuth authentication, it has built-in support for authentication using email/passwordless/magic link/username/password.
We can configure SvelteKitAuth to use database sessions (MySQL, Postgres, MSSQL, MongoDB etc.) or JWT.
It comes with a built-in security mechanism having features like Signed, prefixed, server-only cookies, has built-in CSRF protection & doesn't rely on client-side JavaScript.
Why choose SvelteKitAuth?
Although there are other options available as well, the reason I choose SvelteKitAuth is that it supports OAuth 1.0, 1.0A, 2.0 and OpenID Connect and has built-in support for the most popular sign-in services like Google, GitHub, Auth0, Salesforce etc. It also supports multiple popular database adapters like MySQL, Postgres, MSSQL, MongoDB etc. Apart from that it provides a mechanism to create a custom OAuth provider and custom database adapter as well.
Another reason for going ahead with SvelteKitAuth is it has bigger community support and is backed by Vercel which makes it runtime agnostic, runs anywhere & supports Vercel Edge Functions, Node.js, and Serverless.
How does SvelteKitAuth work under the hood?
To understand how SvelteKitAuth works under the hood, let's explore its internal architecture and the steps involved in the authentication flow.
Configuration: When setting up SvelteKitAuth, you define a configuration file that specifies authentication providers, such as Google, GitHub, or a custom provider. The configuration also includes settings like secret keys, session storage options, and callback URLs.
Authentication Providers: SvelteKitAuth supports multiple authentication providers, and you can choose the ones you want to enable. Each provider has its configuration options, such as client ID, client secret, scopes, and authorization URLs.
Client-Side Flow: When a user initiates the authentication process, SvelteKitAuth handles the flow by redirecting them to the respective authentication provider's login page. This typically involves generating a state and storing it in a server-side session to prevent CSRF attacks.
Callback URL: After successful authentication with the provider, the user is redirected back to a callback URL specified in the SvelteKitAuth configuration. This URL is typically an API route that SvelteKitAuth exposes.
Server-Side Flow: SvelteKitAuth receives the callback request on the specified API route. It validates the received data, including the state parameter, to ensure it matches the stored session state. This step prevents CSRF attacks.
Token Exchange: SvelteKitAuth then exchanges the authorization code received from the authentication provider with an access token. This token allows SvelteKitAuth to make authenticated API requests on behalf of the user.
User Information: With the access token, SvelteKitAuth retrieves the user's profile information from the authentication provider's API. It can fetch details like name, email, profile picture, or any other data that the provider makes available.
Session Management: SvelteKitAuth creates a session for the authenticated user, typically using a secure HTTP-only cookie or a JWT (JSON Web Token). This session contains the user's data and is used for subsequent authenticated requests.
Persistent Sessions: SvelteKitAuth can optionally store session information in a database or other storage mechanisms. This allows users to remain logged in even if the server restarts or the user refreshes the page.
Hooks and Events: SvelteKitAuth provides various hooks and events that you can use to customize the authentication flow, add additional functionality, or integrate with external systems. Examples include the
$page.data.sessionfor accessing the session data in components and event hooks likesignInorsignOutfor performing actions on authentication events.
Overall, SvelteKitAuth abstracts away the complexities of authentication and provides a unified API for integrating with multiple authentication providers. It handles the authentication flow, token exchange, and session management, allowing developers to focus on building their applications without getting caught up in the intricacies of authentication protocols.
How does OAuth work?
As I mentioned earlier that this guide will focus on implementing authentication in SvelteKit using SvelteKitAuth and OAuth providers, we must know how OAuth works.
Auth.js has given a detailed explanation on this topic and I will be quoting that from their site as is. Without going into too much detail, the OAuth flow generally has 6 parts:
The application requests authorization to access service resources from the user.
If the user authorized the request, the application receives an authorization grant.
The application requests an access token from the authorization server (API) by presenting authentication of its own identity, and the authorization grant.
If the application identity is authenticated and the authorization grant is valid, the authorization server (API) issues an access token to the application. Authorization is complete.
The application requests the resource from the resource server (API) and presents the access token for authentication.
If the access token is valid, the resource server (API) serves the resource to the application.
For more details, check out Aaron Parecki's blog post - OAuth2 Simplified or Postman's blog post - OAuth 2.0: Implicit Flow is Dead, Try PKCE Instead.
Configuring SvelteKitAuth with Auth0
In this section, we will start integrating the SvelteKit application with SvelteKitAuth and Auth0.
Creating an Auth0 Application
Before we start with coding, first we need to have an Auth0 application. Let's create one.
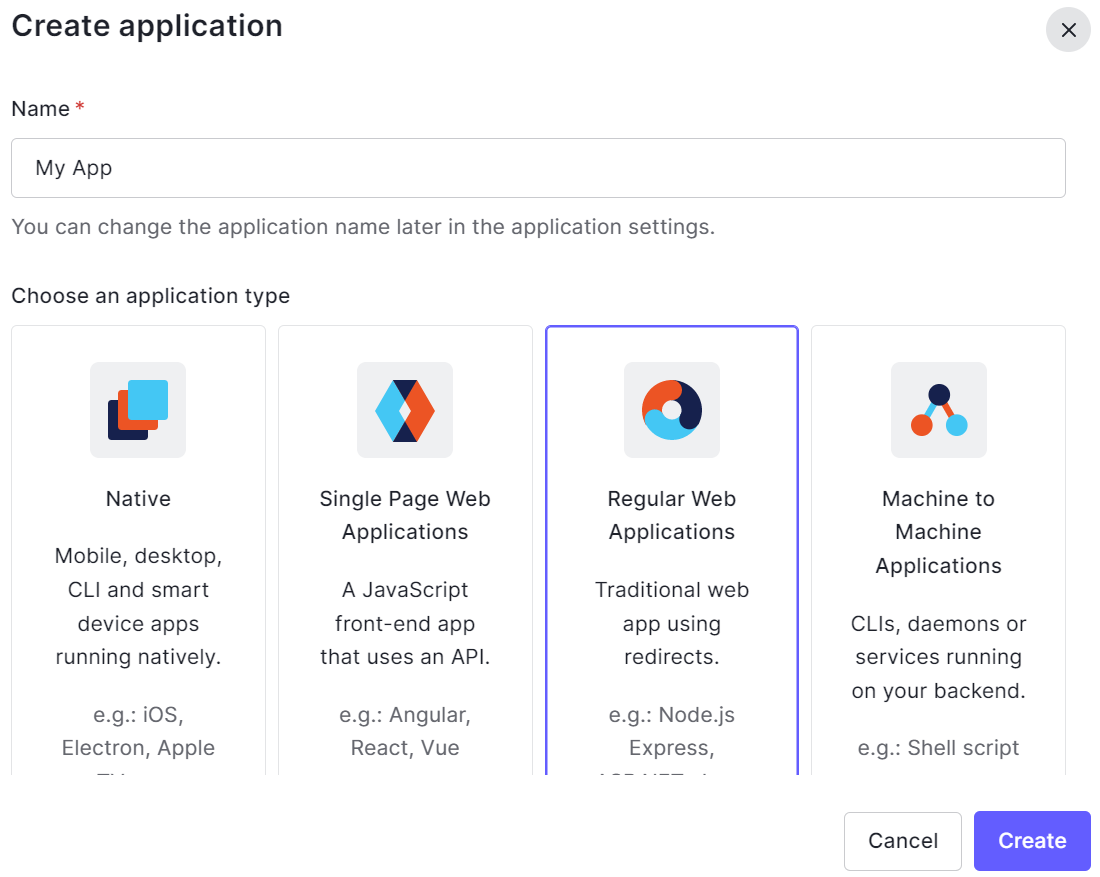
Assuming you have a registered account with Auth0, on L.H.S. navigation, click on "Applications" -> "Create Application".

Enter the Application name and choose the application type as "Regular Web Applications".
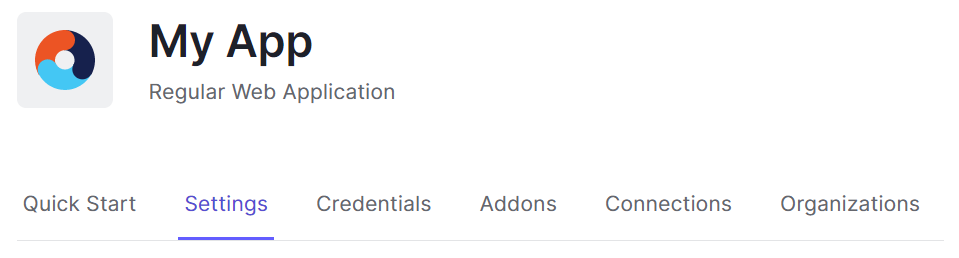
You should reach the dashboard page now. Click on the "Settings" tab.
Scroll down to the section "Application URIs" -> "Allowed Callback URLs". A callback URL is a URL that is invoked after OAuth authorization for the consumer. SvelteKitAuth has a specific pattern for callback URL which is
<origin>/auth/callback/providerIdWe must follow this pattern. We will enter two values here, one which we use for local developmenthttp://localhost:4000/auth/callback/auth0and the other one where we hoist our sitehttps://my-app.vercel.app/auth/callback/auth0we can also use a wildcard pattern to whitelist entire domain:https://*.vercel.app.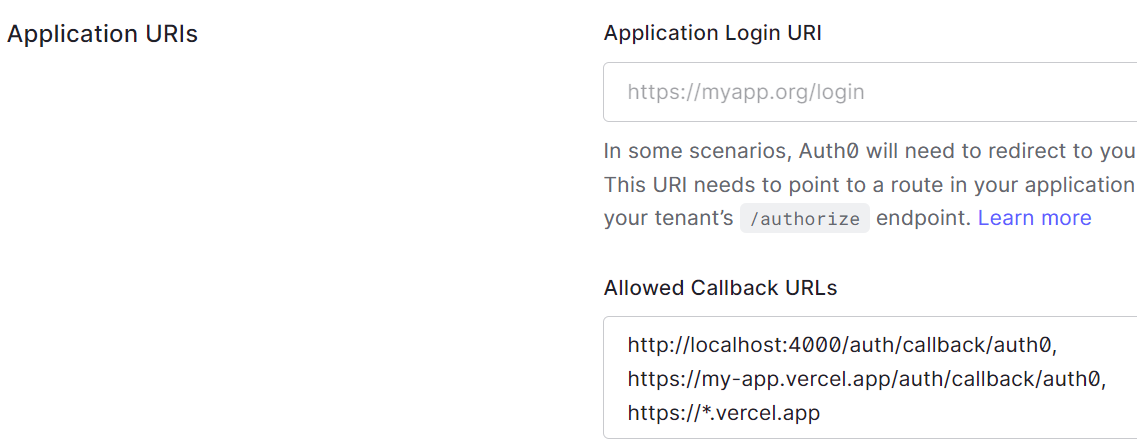
The next section will be "Allowed web origins" within "Application URIs"
http://localhost:4000, https://*.vercel.appClick on "Save Changes".
With these changes, our OAuth application is now ready and we can configure this with SvelteKitAuth.
Configuring SvelteKitAuth built-in Auht0 provider
Before we begin, let's install two dependencies:
"@auth/core": "^0.4.0",
"@auth/sveltekit": "^0.2.1"
As I have mentioned earlier that SvelteKitAuth has built-in support for the most popular sign-in services like Google, GitHub, Auth0, Salesforce etc. We will be using a built-in Auth0 provider.
Here is the code snippet that we will be using in src/hooks.server.ts. Let us now deep dive into Auth0Provider and the properties that are used within the provider.
// file -> src/hooks.server.ts

import { SvelteKitAuth, type SvelteKitAuthConfig } from '@auth/sveltekit';
import Auth0Provider from '@auth/core/providers/auth0';
import type { Provider } from '@auth/core/providers';
import type { Handle } from '@sveltejs/kit';

const config: SvelteKitAuthConfig = {
  providers: [
    Auth0Provider({
      id: 'auth0',
      name: 'Auth0',
      clientId: '-client-id-',
      clientSecret: '-client-secret-',
      issuer: 'https://dev-****.auth0.com/',  // <- remember to add trailing `/`
      wellKnown: 'https://dev-****.auth0.com/.well-known/openid-configuration'
    }) as Provider
  ],
  secret: '-any-random-string-',
  debug: true,
  session: {
    maxAge: 1800 // 30 mins
  }
};

export const handle = SvelteKitAuth(config) satisfies Handle;
id: It is a string value that you can assign to uniquely identify the provider. As we can see from the syntax
providers[{...}]is an array and hence this id property helps in referencing a particular provider in the case where we have multiple providers. Also, this particular id is used in the callback URL pattern. Our callback URL is http://localhost:4000/auth/callback/auth0, here "auth0" comes from this "id" parameter. It is an optional parameter, if we skip this, it defaults to the in-built provider that we are using, in this case, "Auth0".name: This is an optional property where-in you can provide any string value, preferred one is the name of the OAuth provider you're using i.e. "Auth0"
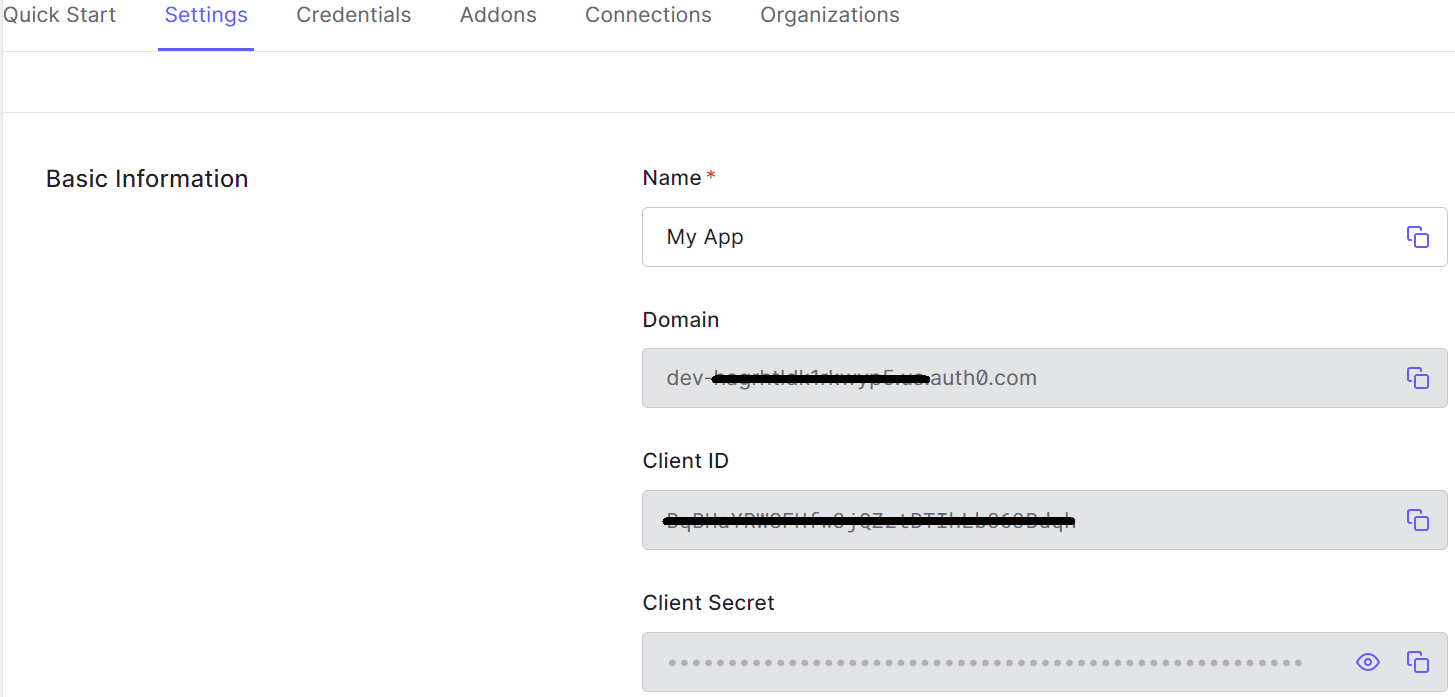
clientId: is a unique identifier that is assigned to an application when it registers with an OAuth 2.0 service provider. The
clientIdis used by the application to authenticate itself to the service provider and to obtain access tokens. Client Id value can be obtained from the OAuth application. In your Auth0 application go to -> Settings tab -> Basic Information Section -> Get Client ID string.clientSecret: is a secret key that is used to protect the client ID. The
clientSecretis not shared with the service provider and must be kept confidential by the application. Client Secret value similar to Client ID can be retrieved from the Basic Information Section of your Auth0 application.issuer: The issuer is the domain of your Auth0 application which can be fetched from the Basic Information Section of your Auth0 application.
- wellKnown: The wellKnow URL is a preassigned stable end-point that a server uses every time it runs. It contains information about where to fetch tokens and user information post-authentication.
We conclude this section on working with built-in providers. In the next section, I am going to demonstrate how to work with a custom provider.
Configuring SvelteKitAuth custom provider
Before we begin, I want to point out that this section aims to showcase how a custom provider can be configured with SvelteKitAuth. In the previous section, we have already configured built-in providers, so if you want you can skip this section - Initiating sign-in and sign-out flow.
Here is the code snippet that we will be using in src/hooks.server.ts. Let us now deep dive into custom providers and the properties that are used within the provider.
const config: SvelteKitAuthConfig = {
  providers: [{
    id: 'auth0',
    name: 'Auth0',
    type: 'oidc',
    clientId: '-client-id-',
    clientSecret: '-client-secret-',
    issuer: 'https://dev-***.auth0.com/', // <- remember to add trailing `/`
    wellKnown: 'https://dev-***.auth0.com/.well-known/openid-configuration'
  }],
  secret: 'cfc1bb18fc9ba615ea8a3f6db2df089c',
  debug: false,
  session: {
    maxAge: 1800 // 30 mins
  }
};

export const handle = SvelteKitAuth(config) satisfies Handle;
id,name,clientId,clientSecret,issuerandwellKnown- these configuration remains the same as they were discussed in the last section, the focus here will be ontypeproperty. Thetypeproperty specifies the type of authentication mechanism, allowed values are: "oidc", "oauth", "credentials" and "email".If your Provider is OpenID Connect (OIDC) compliant, the recommendation is to use the
wellKnownoption instead. OIDC usually returns anid_tokenfrom thetokenendpoint.SvelteKitAuthcan decode theid_tokento get the user information, instead of making an additional request to theuserinfoendpoint.In case your provider is not OIDC compliant, we have the option to customize the configuration by using a combination of the following properties. You can find more information in the docs.
authorization: This is the URL for authentication. There are two ways to use this option:
You can either set
authorizationto be a full URL, like"https://example.com/oauth/authorization?scope=email".Use an object with
urlandparamslike soauthorization: { url: "https://example.com/oauth/authorization", params: { scope: "email" } }
token: This is the URL that will fetch token information. There are three ways to use this option:
You can either set
tokento be a full URL, like"https://example.com/oauth/token?some=param".Use an object with
urlandparamslike sotoken: { url: "https://example.com/oauth/token", params: { some: "param" } }Completely take control of the request:
 token: {
   url: "https://example.com/oauth/token",
   async conform(response) {
     if (response.ok) {
       const body = await response.clone().json()
       if (body?.response?.access_token) {
         return new Response(JSON.stringify(body.response), response)
       } else if (body?.access_token) {
         console.warn("Token response conforms to the standard, workaround not needed.")
       }
     }
     return response
   }
 }
userinfo: A
userinfoendpoint returns information about the logged-in user. It is not part of the OAuth specification but is usually available for most providers. There are three ways to use this option:You can either set
userinfoto be a full URL, like"https://example.com/oauth/userinfo?some=param".Use an object with
urlandparamslike souserinfo: { url: "https://example.com/oauth/userinfo", params: { some: "param" } }Completely take control of the request:
 userinfo: {
   url: "https://example.com/oauth/userinfo",
   // The result of this method will be the input to the `profile` callback.
   async conform(response) {
     if (response.ok) {
       const body = await response.clone().json()
       if (body?.response?.access_token) {
         return new Response(JSON.stringify(body.response), response)
       } else if (body?.access_token) {
         console.warn("Token response conforms to the standard, workaround not needed.")
       }
     }
     return response
   }
 }
secret: A random string used to hash tokens, sign cookies and generate cryptographic keys. If not specified, it falls back to
AUTH_SECRETorNEXTAUTH_SECRETfrom environment variables. To generate a random string, you can use the following command:On Unix systems, type
openssl rand -hex 32in the terminalOr generate one online
debug: This is a boolean property. Set debug to true to enable debug messages for authentication and database operations
session: Configure your session like if you want to use JWT or a database, how long until an idle session expires, or to throttle write operations in case you are using a database.
There are other optional properties as well which are not covered in this tutorial as they are out of scope but I would strongly recommend going through those properties in the official documentation.
We conclude this section on working with custom providers. In the next section, I am going to demonstrate how to initiate sign-in and sign-out.
Initiating sign-in and sign-out flow
Sign-in Flow
signIn() is the client-side method to initiate a sign-in flow or send the user to the sign-in page listing all possible providers. It automatically Automatically adds the CSRF token to the request.
Use signIn() method with the following properties:
providerId: This is the "id" property that we have specified in the previous sections. This is optional, if we omit this, it defaults to the first id property specified in the SvelteKit configuration.
options: This is an optional property where we can specify the callbackURL i.e. the URL to which the user should be redirected once sign-in is successful. In some cases, you might want to deal with the sign-in response on the same page and disable the default redirection. For example, if an error occurs (like wrong credentials given by the user), you might want to handle the error on the same page. For that, you can pass
redirect: falsein the second parameter object.Additional parameters: It is also possible to pass additional parameters to the
/authorizeendpoint through the third argument ofsignIn().
Although this is more than enough if you still want to deep dive into more options, you can read more configuration details in the official documentation.
<script lang="ts">
  import { signIn } from '@auth/sveltekit/client';
</script>

<button on:click={() => signIn(
  'auth0', {
    redirect: false,
    callbackUrl: 'http://localhost:4000/about'
  },
  {
    scope: 'api openid profile email'
  }
)}>Sign In with Auth0</button>
You can also programmatically sign-in user:
// -> src/routes/login/+page.server.ts file
import type { PageServerLoad } from './$types';
import { redirect } from '@sveltejs/kit';

export const load = (async ({ fetch, locals }) => {
  let url = '';
  try {
    const session = await locals.getSession();
    if (!session?.user) {
      const tokenCall = await fetch('/auth/csrf');
      const csrfTokenResponse = await new Response(tokenCall.body).json();
      const csrfToken = csrfTokenResponse.csrfToken;

      const params = new URLSearchParams();
      params.append('scope', 'api openid profile email');

      const formData = new URLSearchParams();
      formData.append('redirect', 'false');
      formData.append('csrfToken', csrfToken);

      const signInRequest = await fetch('/auth/signin/auth0? ' + params.toString(), {
        method: 'POST',
        headers: {
          'Content-Type': 'application/x-www-form-urlencoded',
          'X-Auth-Return-Redirect': '1'
        },
          body: formData.toString()
      });
      const signInResponse = await new Response(signInRequest.body).json();

      if (signInResponse?.url) {
        url = signInResponse.url;
      }
    }
  } catch (e: any) {
    console.log('Exception thrown while auto-sign-in: ', e);
  }

  if (url) {
    throw redirect(302, url);
  }
}) satisfies PageServerLoad;
NOTE: In the above code snippet, if you provide the option of callbackUrl within formData that will be the output of signInResponse, else it will default to the URL of the page that initiated the sign-in request!
Sign-out Flow
The signOut() logs the user out, by removing the session cookie. Automatically adds the CSRF token to the request.
Like signIn() method, you can pass a callbackURL and redirect option. More details in the official documentation
<script lang="ts">
  import { signOut } from '@auth/sveltekit/client';
</script>

<button on:click={() => signOut()} class="button">Sign out</button>
<!-- OR -->
<button on:click={() => signOut({
  redirect: true,
  callbackUrl: 'url-post-logout'
})} class="button">Sign out with optional params</button>
NOTE: If you don't provide the callbackUrl option, it will redirect you to the page that initiated the sign-in request.
You can programmatically sign out the user as well:
// -> src/routes/logout/+page.server.ts file
import { redirect } from '@sveltejs/kit';
import type { PageServerLoad } from './$types';

export const load = (async ({ fetch, locals, url: _url }) => {
  let url = '';
  try {
    const session = await locals.getSession();
    if (session && !!session.user.access_token) {
      const tokenCall = await fetch('/auth/csrf');
      const csrfTokenResponse = await new Response(tokenCall.body).json();
      const csrfToken = csrfTokenResponse.csrfToken;

      const formData = new URLSearchParams();
      formData.append('redirect', 'false');
      formData.append('callbackUrl', `${_url.origin}`);
      formData.append('csrfToken', csrfToken);

      const signOutRequest = await fetch('/auth/signout', {
        method: 'POST',
        headers: {
          'Content-Type': 'application/x-www-form-urlencoded',
          'X-Auth-Return-Redirect': '1'
        },
        body: formData.toString()
      });
      const signOutResponse = await new Response(signOutRequest.body).json();

      if (signOutResponse?.url) {
        url = signOutResponse.url;
      }
    }
  } catch (e: any) {
    console.log('Exception thrown while auto-sign-out: ', e);
  }

  if (url) {
    throw redirect(302, url);
  }
}) satisfies PageServerLoad;
NOTE: After signing out, we must reload the page. If we use inbuild signOut() the SvelteKitAuth auto reloads the page and redirects to the callbackUrl or to the URL that initiated the sign-in request. Since we programmatically logged users out, it is our responsibility to reload the page once.
<!-- src/routes/logout/+page.svelte file -->
<script lang="ts">
  import { onMount } from 'svelte';
  import { page } from '$app/stores';
  import { goto } from '$app/navigation';

  onMount(() => {
    // session-storage ensures that we reload only once!
    const isAppReloaded = sessionStorage.getItem('reloadApp') || 'false';
    if (isAppReloaded === 'false') {
      sessionStorage.setItem('reloadApp', 'true');
      window.location.reload();
    }
  });
</script>
Sign-out user from the Application vs Sign-out user from OAuth provider
When you trigger a signOut() the SvelteKitAuth logs the user out from your application by clearing session-token cookie and resetting Session to null. But the user is still active in the OAuth provider's session layer. You can read more about this in the official Auth0 documentation and this holds for all the OAuth providers.
You can verify the above statement in the following way:
If you log in for the very first time using the
signIn(), you'll see a pop-up from your OAuth provider for credentials.Now log out using
signOut()Verify that thesession-tokenand theSessionare nullified.Log in back with the
signIn()This time, you won't see any pop-up asking for credentials, instead you will be auto-logged the moment you press the sign-in button!
This proves that the user session was still active in the Auth0 session layer. If you want to clear the user session on Auth0's session layer as well, you will have to logout the user out of Auth0 using the OIDC endpoint.
<!-- src/routes/logout/+page.svelte file -->
<script lang="ts">
  import { onMount } from 'svelte';
  import { page } from '$app/stores';

  onMount(async () => {
    const idToken = $page.data?.session?.user.id_token as string;
    window.location.href =
            import.meta.env.VITE_ISSUER +
            `oidc/logout?post_logout_redirect_uri=${encodeURIComponent(
                window.location.origin
            )}&id_token_hint=${idToken}`;
  });
</script>
The above code snippet showcases one of the many ways to log out users from the Auth0 session layer.
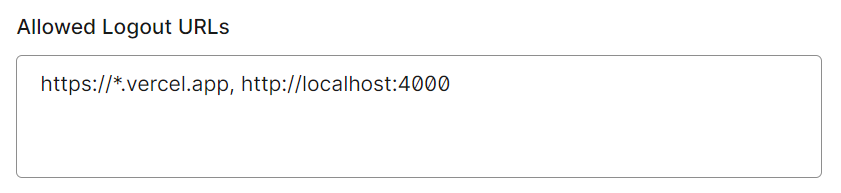
We need one more do one more configuration in our Auth0 application. We need to add the URL to the Allowed Logout URLs option. I am always redirecting users to the home page and hence I've given the URL of my root page, if you wish to redirect the user to any other page, that URL must be whitelisted here.
We conclude this section on working with the sign-in and the sign-out flow. In the next section, I am going to demonstrate how to manage sessions in the application.
Managing Session
As soon as the authentication is successful, SvelteKitAuth populates user sessions within locals that are accessible across the server-side code (i.e. hooks.server.ts, +page.server.ts and +layout.server.ts). Here is the programmatic representation of the statement:
src/hooks.server.ts
const config: SvelteKitAuthConfig = { ... }
export const handle = SvelteKitAuth(config) satisfies Handle;
src/routes/+layout.server.ts
We can access the session using getSession() method and create a global variable session The main reason behind using the layout file here is we want this data to be available to all the routes. What we return in the function LayoutServerLoad will be available inside the $page store, in the data property: $page.data. In this case, we return an object with the 'session' property which is what we are accessing in the other code paths.
export const load: LayoutServerLoad = async (event) => {
  const session = await event.locals.getSession();
  return { session };
};
In the src/routes/+page.svelte.ts file, we can access the session variable:
<script>
  import { page } from '$app/stores';
</script>

{#if $page.data?.session?.user}
  <span>Display User specific Information</span>
{/if}
This mechanism allows us to handle authorization i.e. protect routes from unauthorized access. Example: Handling Authorization Per Component: The simplest case is protecting a single page, in which case you should put the logic in the +page.server.ts file.
import { redirect } from "@sveltejs/kit";
import type { PageServerLoad } from "./$types";

export const load: PageServerLoad = async (event) => {
  const session = await event.locals.getSession();
  if (!session?.user) throw redirect(303, "/auth");
  return {};
};
We can also customize logic to handle authorization per path, I would strongly encourage readers to go through these three resources:
Conclusion
NOTE: The contents of this article are now outdated. Please refer the updated content here: Authentication in SvelteKit using SvelteKitAuth
We have seen how to configure SvelteKitAuth with the OAuth provider and achieve a seamless authentication experience. Here is the link for the official demo of this tutorial and codebase. As an extension to this article, I have included one more example of authentication in SvelteKitAuth using the Salesforce provider in a separate blog post.
References
- Implement Refresh Token Rotation